 ChuckandClaude Opus 5
0c5b9c57d3
ChuckandClaude Opus 5
0c5b9c57d3
* fix(service): survive corrupt health cache and clean exits

Three independent failure modes that each end with a dark panel and no
automatic recovery.

1. PluginHealthTracker._load_health_state returned the cached value
   verbatim. If that value is not a dict, every caller raises
   AttributeError: 'list' object has no attribute 'get' — during
   DisplayController.__init__, so the process dies before the display
   loop starts. systemd restarts it, the same bad entry is read back
   from disk, and it dies again: an unattended restart loop that
   survives reboots because the cause is persisted. Observed in the
   field with plugin_health:<id> holding an unrelated plugin's list
   payload. Now non-dict entries are discarded with a warning and the
   defaults are rebuilt.

2. ledmatrix.service used Restart=on-failure, so any exit with status 0
   left the unit stopped and the panel dark indefinitely — systemd
   treats it as success and never brings it back. Restart=always.

3. ledmatrix-wifi-monitor.service used StandardOutput=syslog, which
   systemd has marked obsolete; it warns and rewrites it to journal on
   every load.

Co-Authored-By: Claude Opus 5 <noreply@anthropic.com>

* perf(memory): size the cache to the board and stop reinstalling deps

On a 1GB Pi 3B+ the display process settles around 600MB RSS of 905MB
total. When the remaining headroom runs out the failure is not a clean
crash: fork() starts returning ENOMEM, so sshd accepts connections and
closes them before its banner, timer jobs stop running, and the panel
goes dark, while already-resident processes keep serving normally. The
board looks healthy from outside and cannot be logged into. Only a power
cycle clears it.

Three contributing causes:

- MemoryCache had a fixed 1000-entry ceiling. Entries are parsed API
  payloads of tens of KB, so one ceiling cannot serve both a 512MB Zero
  2 W and an 8GB Pi 5. Now scaled from MemTotal (150 entries at <=1GB,
  1500 at >=8GB), overridable with LEDMATRIX_CACHE_MAX_ENTRIES.

- requirements_are_satisfied() returned False for any requirement with
  extras, so a plugin depending on python-socketio[client] re-ran pip on
  every single start: ~8s, a network dependency, and a 100-200MB spike
  at the least convenient moment. During a restart loop it repeats for
  each restart. Extras are now resolved one level deep against installed
  metadata, keeping the conservative "anything unverifiable falls
  through to pip" contract.

- ledmatrix.service had no memory ceiling. MemoryMax=85% expressed as a
  percentage so one unit file suits every board. Note this needs the
  memory cgroup controller, which Pi firmware disables by default;
  first_time_install.sh now adds cgroup_enable=memory to cmdline.txt,
  and the unit file documents how to verify it took effect.

first_time_install.sh also enables persistent journald storage (capped
at 64M). Default storage is volatile, so every reboot destroys the logs
that would explain why the board rebooted.

Co-Authored-By: Claude Opus 5 <noreply@anthropic.com>

* docs: guidance for 512MB and 1GB boards

Documents the memory ceiling on small boards and, more usefully, what
running into it actually looks like: sshd accepting connections and
closing them before the banner, the web UI still responding normally,
clean ping, a dark panel, and a wrong clock after the next boot. None of
those read as "out of memory", which makes the failure hard to identify
from the symptoms.

Cross-referenced from SSH_UNAVAILABLE_AFTER_INSTALL.md, since "I can't
SSH in any more" is how most people will first meet this.

Co-Authored-By: Claude Opus 5 <noreply@anthropic.com>

* fix: address review findings on the low-memory work

Nine CodeRabbit findings, five in code.

**Health state (the one that matters).** The non-dict guard did not cover a
dict missing fields the callers index directly, which is the shape actually
seen in the wild: a record carrying only circuit_state produced
`plugin clock-simple operation failed: 'circuit_state'` about fifty times a
minute with the panel frozen. The record is now completed against the
defaults per field rather than trusted or discarded wholesale. Per field
matters: a first pass rejected any incomplete record outright, which reset a
tripped breaker and real failure counts to healthy because one optional
field was absent -- an existing test caught it. Values of the wrong type
(a counter persisted as a string, an unknown circuit_state) fall back
individually, valid neighbours survive, and newer fields the schema has
grown since (degraded, degraded_reason) are carried through untouched.

**Cache ceiling.** MemoryCache.set() accepted entries without bound between
cleanup sweeps, which run every 300s by default, so a burst could take the
cache far past max_size -- the unbounded growth the limit exists to stop.
Eviction now runs under the same lock on every write, sharing one helper
with the periodic sweep so the two cannot drift.

**Installer, cgroups.** Only cgroup_enable=memory was checked, so a board
carrying that without cgroup_memory=1 reported success and got no change,
leaving MemoryMax= inert. Each parameter is now checked and appended
independently; verified against all four combinations, single line preserved.

**Installer, journald.** Persistence was inferred from /var/log/journal being
non-empty, which proves neither Storage=persistent nor a size cap -- the
directory survives a switch back to volatile. The effective configuration is
read instead (systemd-analyze cat-config, falling back to the conf files),
and an explicitly configured SystemMaxUse is preserved rather than
overwritten. Verified across volatile, persistent-without-cap,
persistent-with-user-cap, cap-without-storage, and commented-only configs.

**Dependency extras.** _extras_are_satisfied stopped at one level, so a
gated dependency that itself requests an extra (requests[socks]) passed on
the base distribution's version while the extra's own dependency was
missing, and pip was skipped. It now recurses, with a visited
(distribution, extras) set so a cycle terminates.

Docs: both kernel command-line paths documented (the installer falls back to
/boot/cmdline.txt), daemon-reload and restart added after the systemd
override example, memory exhaustion added to the SSH summary with its
power-cycle-only recovery, and a language on the fenced block for MD040.

Tests: five for the health-state repair including the exact wild shape and
that record_failure/record_success no longer raise against it, and one for
the cache ceiling. Both mutation-checked. Full suite 2927 passed, with the
one pre-existing tmpfs failure that also fails on main.

Co-Authored-By: Claude Opus 5 (1M context) <noreply@anthropic.com>
Claude-Session: https://claude.ai/code/session_01STMbQE4YctTacQXfbYqKuW

* fix: harden the health-state repair and confirm journald took effect

Second review round; all three findings were valid and two were bugs in the
repair added last commit.

The repair could raise out of itself. An unhashable circuit_state (a list or
dict on disk) hit `value in {...}` and raised TypeError -- from the code
whose whole job is to stop a malformed record crashing the caller. It now
requires a str before the membership test.

bool is a subclass of int, so True passed the timestamp check and then
compared as 1.0: enough to expire a cooldown the instant the breaker opened,
while False would stop the elapsed check firing at all. Timestamps now
exclude bool explicitly.

The regression test for the original crash was seeded with a record that
*contained* circuit_state, so it passed against the old raw-return behaviour
too -- the counters are read with .get(), so circuit_state is the only field
whose absence used to raise. Reseeded to omit it, and it now fails against
raw-return as intended.

journald: drop-ins apply in lexical order, so a local file sorting after
ledmatrix-persistent.conf still wins and writing ours proves nothing. The
effective Storage is re-read afterwards and a warning naming the diagnostic
command is printed if persistence is still not active, rather than reporting
a success that was not verified.

Full suite 2934 passed, same single pre-existing tmpfs failure.

Co-Authored-By: Claude Opus 5 (1M context) <noreply@anthropic.com>
Claude-Session: https://claude.ai/code/session_01STMbQE4YctTacQXfbYqKuW

---------

Co-authored-by: Claude Opus 5 <noreply@anthropic.com>
LEDMatrix



Welcome to LEDMatrix!
Welcome to the LEDMatrix Project! This open-source project enables you to run an information-rich display on a Raspberry Pi connected to an LED RGB Matrix panel. Whether you want to see your calendar, weather forecasts, sports scores, stock prices, or any other information at a glance, LEDMatrix brings it all together.
About This Project
LEDMatrix is a constantly evolving project that I'm building to create a customizable information display. The project is designed to be modular and extensible, with a plugin-based architecture that makes it easy to add new features and displays.
This project is open source and supports third-party plugin development. I believe that great projects get better when more people are involved, and I'm excited to see what the community can build together. Whether you want to contribute to the core project, develop your own plugins, or just use and enjoy LEDMatrix, you're welcome here!
A Note from the ChuckBuilds
I'm very new to all of this and am heavily relying on AI development tools to create this project. This means I'm learning as I go, and I'm grateful for your patience and feedback as the project continues to evolve and improve.
I'm trying to be open to constructive criticism and support, as long as it's a realistic ask and aligns with my priorities on this project. If you have ideas for improvements, find bugs, or want to add features to the base project, please don't hesitate to reach out on Discord or submit a pull request. Similarly, if you want to develop a plugin of your own, please do so! I'd love to see what you create.
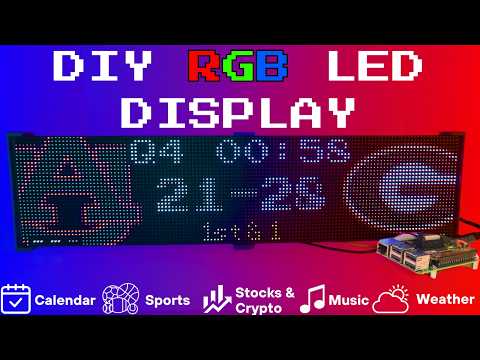
Installing the LEDMatrix project on a pi video:

Setup video and feature walkthrough on Youtube (Outdated but still useful) :
Connect with ChuckBuilds
- Show support on Youtube: https://www.youtube.com/@ChuckBuilds
- Check out the write-up on my website: https://www.chuck-builds.com/led-matrix/
- Stay in touch on Instagram: https://www.instagram.com/ChuckBuilds/
- Want to chat? Reach out on the LEDMatrix Discord: https://discord.com/invite/uW36dVAtcT
- Feeling Generous? Consider sponsoring this project or sending a donation (these AI credits aren't cheap!)
Special Thanks to:
- Hzeller for his groundwork on controlling an LED Matrix from the Raspberry Pi
- Cursor for making this project possible
- CodeRabbit for fixing my PR's
- Everyone involved in this project for their patience, input, and support
Core Features
Core Features
LEDMatrix is a plugin platform: the displays below are plugins installed from the built-in Plugin Store (web interface → Plugins), where each can be individually enabled, ordered, and configured — display durations, teams, stocks, weather, timezones, and more. The core repo ships with just two bundled plugins (`starlark-apps` and `web-ui-info`); the official plugins live in the [ledmatrix-plugins](https://github.com/ChuckBuilds/ledmatrix-plugins) monorepo and install with one click, and third-party plugins can be installed from their own GitHub repositories. Displays available in the store include:Time and Weather
-
Real-time clock display (2x 64x32 Displays 4mm Pixel Pitch)
-
Current Weather, Daily Weather, and Hourly Weather Forecasts (2x 64x32 Displays 4mm Pixel Pitch)
-
Google Calendar event display (2x 64x32 Displays 4mm Pixel Pitch)
Sports Information
The system supports live, recent, and upcoming game information for multiple sports leagues:
-
NHL (Hockey) (2x 64x32 Displays 4mm Pixel Pitch)
-
NBA (Basketball)
-
MLB (Baseball) (2x 64x32 Displays 4mm Pixel Pitch)
-
NFL (Football) (2x 96x48 Displays 2.5mm Pixel Pitch)
-
NCAA Football (2x 96x48 Displays 2.5mm Pixel Pitch)
-
NCAA Men's Basketball
-
NCAA Men's Baseball
-
Soccer (Premier League, La Liga, Bundesliga, Serie A, Ligue 1, Liga Portugal, Champions League, Europa League, MLS)
-
(Note, some of these sports seasons were not active during development and might need fine tuning when games are active)
Financial Information
- Near real-time stock & crypto price updates
- Stock news headlines
- Customizable stock & crypto watchlists (2x 64x32 Displays 4mm Pixel Pitch)
Entertainment
- Music playback information from multiple sources:
- Spotify integration
- YouTube Music integration
- Album art display
- Now playing information with scrolling text (2x 64x32 Displays 4mm Pixel Pitch)
Custom Display Features
-
Custom Text display (2x 64x32 Displays 4mm Pixel Pitch)
-
Youtube Subscriber Count Display (2x 64x32 Displays 4mm Pixel Pitch)
Hardware
Hardware Requirements
Hardware Requirements
| ⚠️ IMPORTANT |
|---|
| This project can be finnicky! RGB LED Matrix displays are not built the same or to a high-quality standard. We have seen many displays arrive dead or partially working in our discord. Please purchase from a reputable vendor. |
Raspberry Pi
- Raspberry Pi Zero's don't have enough processing power for this project.
- Raspberry Pi 3B, 4, or 5
Amazon Affiliate Link – Raspberry Pi 4 4GB RAM
Amazon Affiliate Link – Raspberry Pi 4 8GB RAM
- Pi 5 users: the installer automatically detects Pi 5 and builds the
rpi-rgb-led-matrixlibrary with RP1 support. If you previously installed on a Pi 4 and migrated the SD card, or if you seemmaperrors in the logs, force a fresh library build:sudo RPI_RGB_FORCE_REBUILD=1 ./first_time_install.sh - Pi 5 config: leave
rp1_rioat0(PIO mode, default) and setgpio_slowdownto1or2. - 1GB models (Pi 3B / 3B+) and other low-memory boards: supported, but the
rpi-rgb-led-matrixC++ build needs more memory than the Pi has. The installer detects this automatically, compiles with fewer parallel jobs, and adds a temporary swapfile for the build which it removes afterwards. Expect that step to take 15-25 minutes instead of 2-5, and leave at least 3GB free on the SD card. If you manage swap yourself, opt out with--skip-swap. To pin the compiler down further, use--build-jobs 1.
- Pi 5 users: the installer automatically detects Pi 5 and builds the
RGB Matrix Bonnet / HAT
- Adafruit RGB Matrix Bonnet/HAT – supports one “chain” of horizontally connected displays
- Adafruit Triple LED Matrix Bonnet – supports up to 3 vertical “chains” of horizontally connected displays (use
regular-pi1as hardware mapping) - Electrodragon RGB HAT – supports up to 3 vertical “chains”
- Seengreat Matrix Adapter Board – single-chain LED Matrix (use
regularas hardware mapping)
LED Matrix Panels
(2x in a horizontal chain is recommended)
- Adafruit 64×32 – designed for 128×32 but works with dynamic scaling on many displays (pixel pitch is user preference)
- Waveshare 64×32 - Does not require E addressable pad
- Waveshare 96×48 – higher resolution, requires soldering the E addressable pad on the Adafruit RGB Bonnet to “8” OR toggling the DIP switch on the Adafruit Triple LED Matrix Bonnet (no soldering required!)
Amazon Affiliate Link – ChuckBuilds receives a small commission on purchases
Power Supply
- 5V 4A DC Power Supply (good for 2 -3 displays, depending on brightness and pixel density, you'll need higher amperage for more)
- 5V 10A DC Power Supply (good for 6-8 displays, depending on brightness and pixel density)
Optional but recommended mod for Adafruit RGB Matrix Bonnet
- By soldering a jumper between pins 4 and 18, you can run a specialized command for polling the matrix display. This provides better brightness, less flicker, and better color.
- If you do the mod, we will use the default config with led-gpio-mapping=adafruit-hat-pwm, otherwise just adjust your mapping in config.json to adafruit-hat
- More information available: https://github.com/hzeller/rpi-rgb-led-matrix/tree/master?tab=readme-ov-file
Possibly required depending on the display you are using.
- Some LED Matrix displays require an "E" addressable line to draw the display properly. The 64x32 Adafruit display does NOT require the E addressable line, however the 96x48 Waveshare display DOES require the "E" Addressable line.
- Various ways to enable this depending on your Bonnet / HAT.
Your display will look like it is "sort of" working but still messed up.
or
or
How to set addressable E line on various HATs:
-
Adafruit Single Chain HATs
or
-
Adafruit Triple Chain HAT
-
ElectroDragon RGB LED Matrix Panel Drive Board
2 Matrix display with Rpi connected to Adafruit Single Chain HAT.
Mount / Stand options
Mount/Stand
I 3D printed stands to keep the panels upright and snug. STL Files are included in the Repo but are also available at https://www.thingiverse.com/thing:5169867 Thanks to "Randomwire" for making these for the 4mm Pixel Pitch LED Matrix.
Special Thanks for Rmatze for making:
- 3mm Pixel Pitch RGB Stand for 32x64 Display : https://www.thingiverse.com/thing:7149818
- 4mm Pixel Pitch RGB Stand for 32x64 Display : https://www.thingiverse.com/thing:7165993
These are not required and you can probably rig up something basic with stuff you have around the house. I used these screws: https://amzn.to/4mFwNJp (Amazon Affiliate Link)
Installation Steps
Preparing the Raspberry Pi
Preparing the Raspberry Pi
| ⚠️ IMPORTANT |
|---|
| It is required to use the NEW Raspberry Pi Imager tool. If your tool doesn't look like my screenshots, be sure to update it. |
-
Create RPI Image on a Micro-SD card (I use whatever I have laying around, size is not too important but I would use 8gb or more) using Raspberry Pi Imager
-
Choose your Raspberry Pi (3B+ in my case)
- For Operating System (OS), choose "Other"
- Then choose Raspbian OS (64-bit) Lite (Trixie)
- For Storage, choose your micro-sd card
| ⚠️ IMPORTANT |
|---|
| Make sure it's the correct drive! Data will be erased! |
- Choose the hostname of the device. This will be often used to access the web-ui and will be the name of the device on your network. I recommend "ledpi".
- Choose your timezone and keyboard layout.
- Set your username and password. This is your "root" password and is important, make sure you remember it! We will use it to access the Raspberry Pi via SSH.
- (Optional) Choose your Wi-fi network and enter wifi password. This can be changed in the future. This is also optional if you are going to connect it via ethermet.
- Enable SSH and opt for "Use Password Authentication". You can use public key auth if you know how but for the sake of new folks, let's use the password that we chose in Step 9.
- Disable Raspberry Pi Connect. It's a VPN / Remote Connection tool built into Raspberry Pi, it seems like there might be a subscription? Not sure but I am not using it.
- Double check your settings then confirm by clicking "Write".
- Final warning to be SURE that you have the correct micro-sd card inserted and selected as all data on the drive will be erased.
You're done with preparing the Operating System. Once the Raspberry Pi Imager has finished writing to the micro-sd card it will let you know it is safe to eject. Eject the micro-sd card and plug it into the Raspberry Pi and turn it on.
System Setup & Installation
System Setup & Installation
Once your Raspberry Pi has turned on and connected to your wifi (check your router's dhcp leases) or just give it a few minutes after plugging it in. We will connect via ssh.
Secure Shell (SSH) is a way to connect to the device and execute commands. On Windows, I recommend using Powershell. On MacOS or Linux, I recommend using Terminal.
- SSH into your Raspberry Pi:
ssh ledpi@ledpi
The format "username@hostname" is coincidentally the same for this project (which is fine) but if you changed the username, hostname, or your router's DNS doesn't recognize the hostname you would use "username@ipaddress". You can skip the username and just enter "ssh hostname" or "ssh ipaddress" and it will prompt you for a username.
Quick Install (Recommended)
Paste this single command into SSH using Ctrl+Shift+V on Windows or Shift+Command+V on Mac.
Tip
Terminal can be funky about pasting with just Ctrl+V, by right click -> paste or using Ctrl+Shift+V you will be able to paste without additional unwanted characters.
curl -fsSL https://raw.githubusercontent.com/ChuckBuilds/LEDMatrix/main/scripts/install/one-shot-install.sh | bash
This one-shot installer will automatically:
- Check system prerequisites (network, disk space, memory, sudo access)
- Install required system packages (git, python3, build tools, etc.)
- Clone or update the LEDMatrix repository
- Run the complete first-time installation script
The installation process typically takes 10-30 minutes depending on your internet connection and Pi model. Pi 3B/3B+ and other 1GB boards land at the top of that range, because the C++ library is compiled serially to stay within available memory. All errors are reported explicitly with actionable fixes.
Note: The script is safe to run multiple times and will handle existing installations gracefully.
Manual Installation (Alternative)
If you prefer to install manually or the one-shot installer doesn't work for your setup:
- SSH into your Raspberry Pi:
ssh ledpi@ledpi
- Update repositories, upgrade Raspberry Pi OS, and install prerequisites:
sudo apt update && sudo apt upgrade -y
sudo apt install -y git python3-pip cython3 build-essential python3-dev python3-pillow scons
- Clone this repository:
git clone https://github.com/ChuckBuilds/LEDMatrix.git
cd LEDMatrix
- Run the first-time installation script:
chmod +x first_time_install.sh
sudo bash ./first_time_install.sh
This single script installs services, dependencies, configures permissions and sudoers, and validates the setup.
It finishes by asking whether to reboot. If you run it non-interactively — piped, over a script, or with -y — there is no one to ask, so it reboots immediately without prompting. Pass --no-reboot-prompt to install without rebooting:
sudo bash ./first_time_install.sh -y --no-reboot-prompt
Configuration
Configuration
Configuration
Initial Setup
For a complete list of every key in config.json and
config_secrets.json, see
docs/CONFIG_REFERENCE.md.
For most settings I recommend using the web interface: Edit the project via the web interface at http://[IP ADDRESS or HOSTNAME]:5000 or http://ledpi:5000 .
If you need to manually edit your config file, you can follow the steps below:
Manual Config.json editing
-
First-time setup: The previous "First_time_install.sh" script should've already copied the template to create your config.json:
-
Edit your configuration:
sudo nano config/config.json
Automatic Configuration Migration
The system automatically handles configuration updates:
- New installations: Creates
config.jsonfrom the template automatically - Existing installations: Automatically adds new configuration options with default values when the system starts
- Backup protection: Creates a backup of your current config before applying updates
- No conflicts: Your custom settings are preserved while new options are added
Everything is configured via config/config.json and config/config_secrets.json and are not tracked by Git to prevent conflicts during updates.
Running the Display
Recommended: Use Web UI Quick Actions
I recommend using the web-ui "Quick Actions" to control the Display.
Plugins
Plugin Store
See the Plugin Store documentation for detailed installation instructions.
The easiest way to discover and install plugins is through the Plugin Store in the LEDMatrix web interface:
- Open the web interface (
http://your-pi-ip:5000) - Navigate to the Plugin Manager tab
- Browse available plugins in the Plugin Store
- Click Install on any plugin you want
- Configure and enable plugins through the web UI
Installing 3rd-Party Plugins
You can also install plugins directly from GitHub repositories:
- Single Plugin: Install from any GitHub repository URL
- Registry/Monorepo: Install multiple plugins from a single repository
See the Plugin Store documentation for detailed installation instructions.
For plugin development, check out the Hello World Plugin repository as a starter template.
Visual Skins for Scoreboards
Want a different look for a sports scoreboard without forking the plugin?
Skins restyle the live/recent/upcoming screens while the plugin keeps
handling data, scheduling, caching, and vegas mode. Install one with
git clone <skin repo> skins/<skin-id>, select it in the plugin's config,
and you're done — see docs/SKIN_SYSTEM.md (how it
works) and docs/CREATING_SKINS.md (build your own,
including a ready-made Claude Code prompt).
- Built-in Managers Deprecated: The built-in managers (hockey, football, stocks, etc.) are now deprecated and have been moved to the plugin system. You must install replacement plugins from the Plugin Store in the web interface instead. The plugin system provides the same functionality with better maintainability and extensibility.
Detailed Information
Display Settings from RGBLEDMatrix Library
Display Settings
If you are copying my exact setup, you can likely leave the defaults alone. However, if you have different hardware or want to customize the display behavior, these settings allow you to fine-tune the LED matrix configuration.
The display settings are located in config/config.json under the "display" key and are organized into three main sections: hardware, runtime, and display_durations.
Hardware Configuration (display.hardware)
These settings control the physical hardware configuration and how the matrix is driven.
Basic Panel Configuration
-
rows(integer, default: 32)- Number of LED rows (vertical pixels) in each panel
- Common values: 16, 32, 48, 64
- Must match your physical panel configuration
-
cols(integer, default: 64)- Number of LED columns (horizontal pixels) in each panel
- Common values: 32, 64, 96, 128
- Must match your physical panel configuration
-
chain_length(integer, default: 2)- Number of LED panels chained together horizontally
- If you have 2 panels side-by-side, set to 2
- If you have 4 panels in a row, set to 4
- Total display width =
cols × chain_length
-
parallel(integer, default: 1)- Number of parallel chains (panels stacked vertically)
- Use 1 for a single row of panels
- Use 2 if you have panels stacked in two rows
- Total display height =
rows × parallel
Brightness and Visual Settings
brightness(integer, 0-100, default: 90)- Display brightness level
- Lower values (0-50) are dimmer, higher values (50-100) are brighter
- Recommended: 70-90 for indoor use, 90-100 for bright environments
- Very high brightness may cause distortion or require more power
Hardware Mapping
hardware_mapping(string, default: "adafruit-hat-pwm")- Specifies which GPIO pin mapping to use for your hardware
"adafruit-hat-pwm": Use this for Adafruit RGB Matrix Bonnet/HAT WITH the jumper mod (PWM enabled). This is the recommended setting for Adafruit hardware with the PWM jumper soldered."adafruit-hat": Use this for Adafruit RGB Matrix Bonnet/HAT WITHOUT the jumper mod (no PWM). Remove-pwmfrom the value if you did not solder the jumper."regular": Standard GPIO pin mapping for direct GPIO connections (Generic)"regular-pi1": Standard GPIO pin mapping for Raspberry Pi 1 (older hardware or non-standard hat mapping)- Choose the option that matches your specific hardware setup, if aren't sure try them all.
PWM (Pulse Width Modulation) Settings
These settings affect color fidelity and smoothness of color transitions:
-
pwm_bits(integer, default: 9)- Number of bits used for PWM (affects color depth)
- Higher values (9-11) = more color levels, smoother gradients
- Lower values (7-8) = fewer color levels, but may improve stability on some hardware
- Range: 1-11, recommended: 9-10
-
pwm_dither_bits(integer, default: 1)- Additional dithering bits for smoother color transitions
- Helps reduce color banding in gradients
- Higher values (1-2) = smoother gradients but may impact performance
- Range: 0-2, recommended: 1
-
pwm_lsb_nanoseconds(integer, default: 130)- Least significant bit timing in nanoseconds
- Controls the base timing for PWM signals
- Lower values = faster PWM, higher values = slower PWM
- Typical range: 100-300 nanoseconds
- May need adjustment if you see flickering or color issues
Advanced Hardware Settings
-
scan_mode(integer, default: 0)- Panel scan mode (how rows are addressed)
- Common values: 0 (progressive), 1 (interlaced)
- Most panels use 0, but some require 1
- Check your panel datasheet if colors appear incorrect
-
limit_refresh_rate_hz(integer, default: 100)- Maximum refresh rate in Hz (frames per second)
- Caps the refresh rate for better stability
- Lower values (60-80) = more stable, less CPU usage
- Higher values (100-120) = smoother animations, more CPU usage
- Recommended: 80-100 for most setups
-
disable_hardware_pulsing(boolean, default: false)- Disables hardware pulsing (usually leave as false)
- Set to
trueonly if you experience timing issues - Most users should leave this as
false
-
inverse_colors(boolean, default: false)- Inverts all colors (red becomes cyan, etc.)
- Useful if your panel has inverted color channels
- Set to
trueonly if colors appear inverted
-
show_refresh_rate(boolean, default: false)- Displays the current refresh rate on the matrix (for debugging)
- Set to
trueto see FPS on the display - Useful for troubleshooting performance issues
Advanced Panel Configuration (Advanced Users Only)
These settings are typically only needed for non-standard panels or custom configurations:
-
led_rgb_sequence(string, default: "RGB")- Color channel order for your LED panel
- Common values: "RGB", "RBG", "GRB", "GBR", "BRG", "BGR"
- Most panels use "RGB", but some use "GRB" or other orders
- Check your panel datasheet if colors appear wrong
-
pixel_mapper_config(string, default: "")- Advanced pixel mapping configuration
- Used for custom panel layouts, rotations, or transformations
- Examples: "U-mapper", "Rotate:90", "Mirror:H"
- Leave empty unless you need custom mapping
- See rpi-rgb-led-matrix documentation for full options
-
orientation(string, default: "normal")- Rotates the rendered image to match how the panel is physically mounted
- Set to
"180"(or use the "Upside Down" option in the web UI's Display settings) if the panel is mounted upside down — useful for optimizing where the Raspberry Pi and wiring sit relative to the mounting location - Applied independently of
pixel_mapper_config(appended as a trailingRotate:180mapper), so custom mapper configs keep working alongside it
-
row_address_type(integer, default: 0)- How rows are addressed on the panel
- Most panels use 0 (direct addressing)
- Some panels require 1 (AB addressing) or 2 (ABC addressing)
- Check your panel datasheet if display appears corrupted
-
multiplexing(integer, default: 0)- Panel multiplexing type
- 0 = no multiplexing (standard panels)
- Higher values for panels with different multiplexing schemes
- Check your panel datasheet for the correct value
Runtime Configuration (display.runtime)
These settings control runtime behavior and GPIO timing:
gpio_slowdown(integer, default: 3)- GPIO timing slowdown factor
- Critical setting: Must match your Raspberry Pi model for stability
- Raspberry Pi 3: Use 3
- Raspberry Pi 4: Use 4
- Raspberry Pi 5: Use 1–2 in PIO mode (
rp1_rio: 0, the default); start with1and increase if you see flickering - Raspberry Pi Zero/1: Use 1-2
- Incorrect values can cause display corruption, flickering, or system instability
- If you experience issues, try adjusting this value up or down by 1
Display Durations (display.display_durations)
Controls how long each installed plugin stays visible in seconds before switching to the next one, keyed by plugin id.
- Plugin-specific durations
- Each plugin can have its own duration setting
- Format:
"<plugin-id>": <seconds> - Example:
"hockey-scoreboard": 45shows hockey scores for 45 seconds - Example:
"weather": 20shows weather for 20 seconds - If a plugin doesn't have a duration here, it uses its default (usually 15 seconds)
- You can also set
display_durationin each plugin's individual configuration
Tips for Display Durations:
- Longer durations (30-60 seconds) = more time to read content, slower cycling
- Shorter durations (10-20 seconds) = faster cycling, less time per display
- Balance based on your preference and how much information each display shows
- For example, if you want more focus on stocks, increase the stock plugin's duration value
Display Format Settings
use_short_date_format(boolean, default: true)- Use short date format (e.g., "Jan 15") instead of long format (e.g., "January 15th")
- Set to
falsefor longer, more readable dates - Set to
trueto save space and show more information
Dynamic Duration Settings (display.dynamic_duration)
max_duration_seconds(integer, optional)- Maximum duration cap for plugins that use dynamic durations
- Some plugins can automatically adjust their display time based on content
- This setting limits how long they can extend (prevents one display from dominating)
- Example: If set to 60, a plugin can extend up to 60 seconds even if it requests longer
- Leave unset to use the default cap (typically 90 seconds)
Example Configuration
{
  "display": {
    "hardware": {
      "rows": 32,
      "cols": 64,
      "chain_length": 2,
      "parallel": 1,
      "brightness": 90,
      "hardware_mapping": "adafruit-hat-pwm",
      "scan_mode": 0,
      "pwm_bits": 9,
      "pwm_dither_bits": 1,
      "pwm_lsb_nanoseconds": 130,
      "disable_hardware_pulsing": false,
      "inverse_colors": false,
      "show_refresh_rate": false,
      "limit_refresh_rate_hz": 100
    },
    "runtime": {
      "gpio_slowdown": 4
    },
    "display_durations": {
      "calendar": 30,
      "hockey-scoreboard": 45,
      "weather": 20,
      "stocks": 25
    },
    "use_short_date_format": true,
    "dynamic_duration": {
      "max_duration_seconds": 60
    }
  }
}
Troubleshooting Display Settings
Display is blank or shows garbage:
- Check
rows,cols,chain_length, andparallelmatch your physical setup - Verify
hardware_mappingmatches your HAT/connection type - Try adjusting
gpio_slowdown - Ensure your display doesn't need the E-Addressable line
Colors are wrong or inverted:
- Check
led_rgb_sequence(try "GRB" if "RGB" doesn't work) - Try setting
inverse_colorstotrue - Verify
hardware_mappingis correct for your hardware
Display flickers or is unstable:
- Increase
gpio_slowdownby 1-2 - Lower
limit_refresh_rate_hzto 60-80 - Check power supply (LED matrices need adequate power)
Display is too dim or too bright:
- Adjust
brightness(0-100) - Very high brightness may require better power supply
Performance issues:
- Lower
limit_refresh_rate_hz - Reduce
pwm_bitsto 8 - Set
pwm_dither_bitsto 0
Manual SSH Commands (for reference)
The quick actions essentially just execute the following commands on the Pi.
From the project root directory (ex: /home/ledpi/LEDMatrix):
sudo python3 display_controller.py
This will start the display cycle but only stays active as long as your ssh session is active.
Convenience Scripts
Two convenience scripts are provided for easy service management:
start_display.sh- Starts the LED matrix display servicestop_display.sh- Stops the LED matrix display service
Make them executable with:
chmod +x start_display.sh stop_display.sh
Then use them to control the service:
sudo ./start_display.sh
sudo ./stop_display.sh
Service Installation Details
The first time install will handle this: The LEDMatrix can be installed as a systemd service to run automatically at boot and be managed easily. The service runs as root to ensure proper hardware timing access for the LED matrix.
Installing the Service (this is included in the first_time_install.sh)
- Make the install script executable:
chmod +x scripts/install/install_service.sh
- Run the install script with sudo:
sudo ./scripts/install/install_service.sh
The script will:
- Detect your user account and home directory
- Install the service file with the correct paths
- Enable the service to start on boot
- Start the service immediately
Managing the Service
The following commands are available to manage the service:
# Stop the display
sudo systemctl stop ledmatrix.service

# Start the display
sudo systemctl start ledmatrix.service

# Check service status
sudo systemctl status ledmatrix.service

# View logs
journalctl -u ledmatrix.service

# Disable autostart
sudo systemctl disable ledmatrix.service

# Enable autostart
sudo systemctl enable ledmatrix.service
Web Interface Installation Details
The first time install will handle this: The LEDMatrix system includes Web Interface that runs on port 5000 and provides real-time display preview, configuration management, and on-demand display controls.
Installing the Web Interface Service
The first-time installer (
first_time_install.sh) already installs the web service. The steps below only apply if you need to (re)install it manually.
- Make the install script executable:
chmod +x scripts/install/install_web_service.sh
- Run the install script with sudo:
sudo ./scripts/install/install_web_service.sh
The script will:
- Copy the web service file to
/etc/systemd/system/ - Enable the service to start on boot
- Start the service immediately
- Show the service status
Web Interface Configuration
The web interface can be configured to start automatically with the main display service:
- In
config/config.json, ensure the web interface autostart is enabled:
{
    "web_display_autostart": true
}
- The web interface will now start automatically when:
- The system boots
- The
web_display_autostartsetting istruein your config
Accessing the Web Interface
Once installed, you can access the web interface at:
http://your-pi-ip:5000
Managing the Web Interface Service
# Check service status
sudo systemctl status ledmatrix-web.service

# View logs
journalctl -u ledmatrix-web.service -f

# Stop the service
sudo systemctl stop ledmatrix-web.service

# Start the service
sudo systemctl start ledmatrix-web.service

# Disable autostart
sudo systemctl disable ledmatrix-web.service

# Enable autostart
sudo systemctl enable ledmatrix-web.service
Web Interface Features
- Real-time Display Preview: See what's currently displayed on the LED matrix
- Configuration Management: Edit settings through a web interface
- On-Demand Controls: Start specific displays (weather, stocks, sports) on demand
- Service Management: Start/stop the main display service
- System Controls: Restart, update code, and manage the system
- API Metrics: Monitor API usage and system performance
- Logs: View system logs in real-time
Troubleshooting Web Interface
Web Interface Not Accessible After Restart:
- Check if the web service is running:
sudo systemctl status ledmatrix-web.service - Verify the service is enabled:
sudo systemctl is-enabled ledmatrix-web.service - Check logs for errors:
journalctl -u ledmatrix-web.service -f - Ensure
web_display_autostartis set totrueinconfig/config.json
Port 5000 Not Accessible:
- Check if the service is running on the correct port
- Verify firewall settings allow access to port 5000
- Check if another service is using port 5000
Service Fails to Start:
- Check Python dependencies are installed
- Verify the virtual environment is set up correctly
- Check file permissions and ownership
If you've read this far — thanks!
License
LEDMatrix is licensed under the GNU General Public License v3.0 or later.
LEDMatrix builds on
rpi-rgb-led-matrix,
which is GPL-2.0-or-later. The "or later" clause makes it compatible
with GPL-3.0 distribution.
Plugin contributions in
ledmatrix-plugins
are also GPL-3.0-or-later unless individual plugins specify otherwise.
Contributing
See CONTRIBUTING.md for development setup, the PR flow, and how to add a plugin. Bug reports and feature requests go in the issue tracker. Security issues should be reported privately per SECURITY.md.