 ChuckandClaude Opus 5.5
2236ff3081
ChuckandClaude Opus 5.5
2236ff3081
* fix(web-ui): let the MQTT bridge form save a password without TLS

PUT /api/v3/integrations/mqtt-bridge/config refuses a stored password
while mqtt_tls is off unless allow_insecure_mqtt is set (the CWE-319
guard in api_v3/misc.py). The Tools tab form neither rendered a control
for that flag nor sent it, so a password-protected broker on a LAN
without TLS could never be saved from the UI, and once such a password
was in bridge_config.json every later save from the form was refused.

The form now shows "Allow without TLS (trusted network)" while "Use
TLS" is unchecked, prefilled from the GET's config.allow_insecure_mqtt,
and mqttBody() sends its state as allow_insecure_mqtt. The box is off
until the user ticks it, so the server's guard still refuses a
cleartext password by default.

Tests: the Tools DOM suite checks the control, its show/hide with the
TLS box, the prefill and the value saved; a Flask test pins that the
GET reports the opt-in (false until saved on).

Co-Authored-By: Claude Opus 5.5 <noreply@anthropic.com>

* fix(web-ui): stop the Overview reconciliation poll from running forever

The reconciliation banner script in partials/overview.html re-asked
/api/v3/plugins/reconciliation-status every 2 s until the answer said
done, with no limit. The route answers done: false whenever
ledmatrix_reconciliation.json is missing or unreadable, which happens
when _run_startup_reconciliation raises before writing it or when /tmp
is cleaned under a long-running web service (reconciliation runs once
per process). The browser then sent that request every 2 s for as long
as the page stayed open, on every tab, since the poll was never tied to
the Overview being visible.

The poll now gives up after 30 tries (a minute) and runs only while the
Overview is the active, visible tab, registered with LEDVisibility under
its own key like the other partials' pollers. Dismissing the banner
ends it too.

Test: test/js/unit/test_overview_reconciliation_poll.js runs the shipped
script in a vm with fake timers and fetch.

Co-Authored-By: Claude Opus 5.5 <noreply@anthropic.com>

* fix(web-ui): drop the Display tab's lookup of a removed brightness label

The brightness slider's input handler in partials/display.html set the
text of both #brightness-value and #brightness-display. #387
(978a03b42) removed the "LED brightness: N%" line that carried
#brightness-display, so getElementById returned null and every step of
the slider threw "Cannot set properties of null" into the console. The
visible label still updated, because it is written first.

The dead lookup is removed.

Test: test/js/unit/test_display_partial_ids.js checks every literal
getElementById() in the partial's inline scripts against the ids its
markup renders, and runs the shipped script in a vm to move the slider.

Co-Authored-By: Claude Opus 5.5 <noreply@anthropic.com>

* fix(web-ui): a created API token leaves the General tab's form clean

app.js marks a form data-dirty on any input inside it and removes the
mark only after a successful htmx request; its beforeunload handler
asks "Leave site?" while a visible form is still dirty. The API token
form in partials/general.html posts through window.webLogin.createToken
with fetch, so the mark survived the token being created and a reload
of the page with the General tab open prompted about a change that had
already been saved.

createToken now removes data-dirty after a successful create, next to
the form.reset() it already did. A refused request keeps the mark.

Test: test/js/unit/test_general_web_login_token.js runs the shipped
script in a vm with a fake fetch and DOM.

Co-Authored-By: Claude Opus 5.5 <noreply@anthropic.com>

* test(js): match <script> tags the way CodeQL's tag-filter rule expects

The three new suites pull the inline scripts out of their partials with
/<script>([\s\S]*?)<\/script>/g. CodeQL flags that shape as a bad HTML
filtering regexp (js/bad-tag-filter: misses upper case and tags with
attributes or whitespace), four high alerts that blocked the PR. These are
our own templates read by tests, not user input, but the stricter pattern
costs nothing: /<script\b[^>]*>(...)<\/script[^>]*>/gi, as
test_html_escaping.js already uses.

Co-Authored-By: Claude Opus 5.5 <noreply@anthropic.com>

* test(js): slice the Display partial's markup around its scripts

CodeQL read the script-stripping replace() as an incomplete HTML sanitizer
(js/incomplete-multi-character-sanitization). The test only reads our own
template, but slicing between the matched blocks gives the same markup
without the pattern.

Co-Authored-By: Claude Opus 5.5 <noreply@anthropic.com>

---------

Co-authored-by: Claude Opus 5.5 <noreply@anthropic.com>
LEDMatrix



Welcome to LEDMatrix!
Welcome to the LEDMatrix Project! This open-source project enables you to run an information-rich display on a Raspberry Pi connected to an LED RGB Matrix panel. Whether you want to see your calendar, weather forecasts, sports scores, stock prices, or any other information at a glance, LEDMatrix brings it all together.
About This Project
LEDMatrix is a constantly evolving project that I'm building to create a customizable information display. The project is designed to be modular and extensible, with a plugin-based architecture that makes it easy to add new features and displays.
This project is open source and supports third-party plugin development. I believe that great projects get better when more people are involved, and I'm excited to see what the community can build together. Whether you want to contribute to the core project, develop your own plugins, or just use and enjoy LEDMatrix, you're welcome here!
A Note from the ChuckBuilds
I'm very new to all of this and am heavily relying on AI development tools to create this project. This means I'm learning as I go, and I'm grateful for your patience and feedback as the project continues to evolve and improve.
I'm trying to be open to constructive criticism and support, as long as it's a realistic ask and aligns with my priorities on this project. If you have ideas for improvements, find bugs, or want to add features to the base project, please don't hesitate to reach out on Discord or submit a pull request. Similarly, if you want to develop a plugin of your own, please do so! I'd love to see what you create.
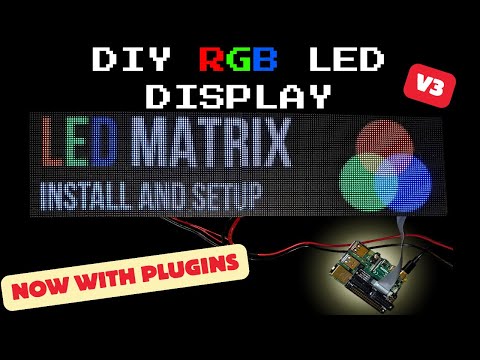
Installing the LEDMatrix project on a pi video:
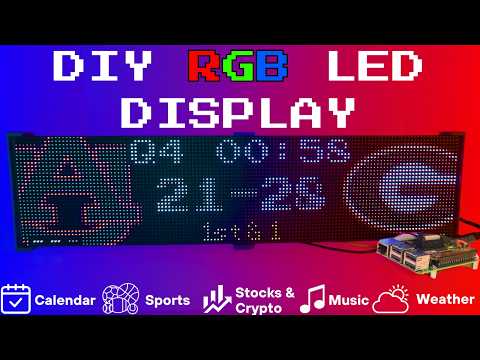
Setup video and feature walkthrough on Youtube (Outdated but still useful) :
Connect with ChuckBuilds
- Show support on Youtube: https://www.youtube.com/@ChuckBuilds
- Check out the write-up on my website: https://www.chuck-builds.com/led-matrix/
- Stay in touch on Instagram: https://www.instagram.com/ChuckBuilds/
- Want to chat? Reach out on the LEDMatrix Discord: https://discord.gg/RdrC37rEag
- Feeling Generous? Consider sponsoring this project or sending a donation (these AI credits aren't cheap!)
Special Thanks to:
- Hzeller for his groundwork on controlling an LED Matrix from the Raspberry Pi
- Cursor for making this project possible
- CodeRabbit for fixing my PR's
- Everyone involved in this project for their patience, input, and support
Core Features
Core Features
LEDMatrix is a plugin platform: the displays below are plugins installed from the built-in Plugin Store (web interface → Plugins), where each can be individually enabled, ordered, and configured — display durations, teams, stocks, weather, timezones, and more. The core repo ships with just two bundled plugins (`starlark-apps` and `web-ui-info`); the official plugins live in the [ledmatrix-plugins](https://github.com/ChuckBuilds/ledmatrix-plugins) monorepo and install with one click, and third-party plugins can be installed from their own GitHub repositories. Displays available in the store include:Time and Weather
-
Real-time clock display (2x 64x32 Displays 4mm Pixel Pitch)
-
Current Weather, Daily Weather, and Hourly Weather Forecasts (2x 64x32 Displays 4mm Pixel Pitch)
-
Google Calendar event display (2x 64x32 Displays 4mm Pixel Pitch)
Sports Information
The system supports live, recent, and upcoming game information for multiple sports leagues:
-
NHL (Hockey) (2x 64x32 Displays 4mm Pixel Pitch)
-
NBA (Basketball)
-
MLB (Baseball) (2x 64x32 Displays 4mm Pixel Pitch)
-
NFL (Football) (2x 96x48 Displays 2.5mm Pixel Pitch)
-
NCAA Football (2x 96x48 Displays 2.5mm Pixel Pitch)
-
NCAA Men's Basketball
-
NCAA Men's Baseball
-
Soccer (Premier League, La Liga, Bundesliga, Serie A, Ligue 1, Liga Portugal, Champions League, Europa League, MLS)
-
(Note, some of these sports seasons were not active during development and might need fine tuning when games are active)
Financial Information
- Near real-time stock & crypto price updates
- Stock news headlines
- Customizable stock & crypto watchlists (2x 64x32 Displays 4mm Pixel Pitch)
Entertainment
- Music playback information from multiple sources:
- Spotify integration
- YouTube Music integration
- Album art display
- Now playing information with scrolling text (2x 64x32 Displays 4mm Pixel Pitch)
Custom Display Features
-
Custom Text display (2x 64x32 Displays 4mm Pixel Pitch)
-
Youtube Subscriber Count Display (2x 64x32 Displays 4mm Pixel Pitch)
Hardware
Hardware Requirements
Hardware Requirements
| ⚠️ IMPORTANT |
|---|
| This project can be finnicky! RGB LED Matrix displays are not built the same or to a high-quality standard. We have seen many displays arrive dead or partially working in our discord. Please purchase from a reputable vendor. |
Raspberry Pi
- Raspberry Pi 3B, 4, or 5 (a Pi Zero 2 W also works, with the limits described under the 1GB/low-memory bullet below; the original Pi Zero / Zero W doesn't have enough processing power for this project)
Amazon Affiliate Link – Raspberry Pi 4 4GB RAM
Amazon Affiliate Link – Raspberry Pi 4 8GB RAM
- Pi 5 users: the installer automatically detects Pi 5 and builds the
rpi-rgb-led-matrixlibrary with RP1 support. If you previously installed on a Pi 4 and migrated the SD card, or if you seemmaperrors in the logs, force a fresh library build:sudo RPI_RGB_FORCE_REBUILD=1 ./first_time_install.sh - Pi 5 config: leave
rp1_rioat0(PIO mode, default) and startgpio_slowdownat1, raising it a step at a time if the image flickers or shows garbage (seegpio_slowdownunder Display Settings). - 1GB models (Pi 3B / 3B+), the 512MB Pi Zero 2 W and other low-memory boards: supported, but the
rpi-rgb-led-matrixC++ build needs more memory than the Pi has. The installer detects this automatically, compiles with fewer parallel jobs, and adds a temporary swapfile for the build which it removes afterwards. Expect that step to take 15-25 minutes instead of 2-5, and leave at least 3GB free on the SD card. If you manage swap yourself, opt out with--skip-swap. To pin the compiler down further, use--build-jobs 1. Once running, keep an eye on memory: see docs/LOW_MEMORY_BOARDS.md.
- Pi 5 users: the installer automatically detects Pi 5 and builds the
Operating system
- Raspberry Pi OS Lite, Trixie (Debian 13) or Bookworm (Debian 12), 64-bit recommended. Trixie is the current release and the one to pick for a new SD card; an existing Bookworm install works as it is, no upgrade needed. The installer checks this first and stops with directions on anything else (Bullseye and older, the desktop edition, other distributions).
- Python: whatever the OS ships, 3.13 on Trixie and 3.11 on Bookworm. Don't install a different Python; the installer and the services use the system
python3. - Networking: NetworkManager, the default on both. Choosing a WiFi network from the web page and the
LEDMatrix-Setuphotspot need it; if you switched to dhcpcd inraspi-config, switch back (Advanced Options → Network Config → NetworkManager).
RGB Matrix Bonnet / HAT
- Adafruit RGB Matrix Bonnet/HAT – supports one “chain” of horizontally connected displays
- Adafruit Triple LED Matrix Bonnet – supports up to 3 vertical “chains” of horizontally connected displays (use
regularas hardware mapping) - Electrodragon RGB HAT – supports up to 3 vertical “chains”
- Seengreat Matrix Adapter Board – single-chain LED Matrix (use
regularas hardware mapping)
LED Matrix Panels
(2x in a horizontal chain is recommended)
- Adafruit 64×32 – designed for 128×32 but works with dynamic scaling on many displays (pixel pitch is user preference) **Warning: Lately the Waveshare Panels have had different variations - only some are compatible with this project. I hope to identify what is different to fix it but so far there is a decent chance you get a mis-matched set of panels if you don't buy them all at once! **
- Waveshare 64×32 - Does not require E addressable pad
- Waveshare 96×48 – higher resolution, requires soldering the E addressable pad on the Adafruit RGB Bonnet to “8” OR toggling the DIP switch on the Adafruit Triple LED Matrix Bonnet (no soldering required!)
- There are some Panels on Aliexpress that have worked fine for me, shop around! I think Adafruit is probably the "safest" but they do have some limitation on resolution and layout.
Amazon Affiliate Links – ChuckBuilds receives a small commission on purchases
Power Supply
- 5V 4A DC Power Supply (good for 2 -3 displays, depending on brightness and pixel density, you'll need higher amperage for more)
- 5V 10A DC Power Supply (good for 6-8 displays, depending on brightness and pixel density)
Optional but recommended mod for Adafruit RGB Matrix Bonnet
- By soldering a jumper between pins 4 and 18, you can run a specialized command for polling the matrix display. This provides better brightness, less flicker, and better color.
- The default config uses
hardware_mappingadafruit-hat. If you do the mod, change it toadafruit-hat-pwm(Display settings in the web interface, orconfig.json) - More information available: https://github.com/hzeller/rpi-rgb-led-matrix/tree/master?tab=readme-ov-file
Possibly required depending on the display you are using.
- Some LED Matrix displays require an "E" addressable line to draw the display properly. The 64x32 Adafruit display does NOT require the E addressable line, however the 96x48 Waveshare display DOES require the "E" Addressable line.
- Various ways to enable this depending on your Bonnet / HAT.
Your display will look like it is "sort of" working but still messed up.
or
or
How to set addressable E line on various HATs:
-
Adafruit Single Chain HATs
or
-
Adafruit Triple Chain HAT
-
ElectroDragon RGB LED Matrix Panel Drive Board
2 Matrix display with Rpi connected to Adafruit Single Chain HAT.
Mount / Stand options
Mount/Stand
I 3D printed stands to keep the panels upright and snug. STL Files are included in the Repo but are also available at https://www.thingiverse.com/thing:5169867 Thanks to "Randomwire" for making these for the 4mm Pixel Pitch LED Matrix.
Special Thanks for Rmatze for making:
- 3mm Pixel Pitch RGB Stand for 32x64 Display : https://www.thingiverse.com/thing:7149818
- 4mm Pixel Pitch RGB Stand for 32x64 Display : https://www.thingiverse.com/thing:7165993
These are not required and you can probably rig up something basic with stuff you have around the house. I used these screws: https://amzn.to/4mFwNJp (Amazon Affiliate Link)
Installation Steps
Preparing the Raspberry Pi
Preparing the Raspberry Pi
| ⚠️ IMPORTANT |
|---|
| It is required to use the NEW Raspberry Pi Imager tool. If your tool doesn't look like my screenshots, be sure to update it. |
-
Create RPI Image on a Micro-SD card (I use whatever I have laying around, size is not too important but I would use 8gb or more) using Raspberry Pi Imager
-
Choose your Raspberry Pi (3B+ in my case)
- For Operating System (OS), choose "Other"
- Then choose Raspbian OS (64-bit) Lite (Trixie). Bookworm Lite (listed as Legacy) also works; see Operating system below
- For Storage, choose your micro-sd card
| ⚠️ IMPORTANT |
|---|
| Make sure it's the correct drive! Data will be erased! |
- Choose the hostname of the device. This will be often used to access the web-ui and will be the name of the device on your network. I recommend "ledpi".
- Choose your timezone and keyboard layout.
- Set your username and password. This is your "root" password and is important, make sure you remember it! We will use it to access the Raspberry Pi via SSH.
- (Optional) Choose your Wi-fi network and enter wifi password. This can be changed in the future. This is also optional if you are going to connect it via ethermet.
- Enable SSH and opt for "Use Password Authentication". You can use public key auth if you know how but for the sake of new folks, let's use the password that we chose in Step 9.
- Disable Raspberry Pi Connect. It's a VPN / Remote Connection tool built into Raspberry Pi, it seems like there might be a subscription? Not sure but I am not using it.
- Double check your settings then confirm by clicking "Write".
- Final warning to be SURE that you have the correct micro-sd card inserted and selected as all data on the drive will be erased.
You're done with preparing the Operating System. Once the Raspberry Pi Imager has finished writing to the micro-sd card it will let you know it is safe to eject. Eject the micro-sd card and plug it into the Raspberry Pi and turn it on.
System Setup & Installation
System Setup & Installation
Once your Raspberry Pi has turned on and connected to your wifi (check your router's dhcp leases) or just give it a few minutes after plugging it in. We will connect via ssh.
Secure Shell (SSH) is a way to connect to the device and execute commands. On Windows, I recommend using Powershell. On MacOS or Linux, I recommend using Terminal.
- SSH into your Raspberry Pi:
ssh ledpi@ledpi
The format "username@hostname" is coincidentally the same for this project (which is fine) but if you changed the username, hostname, or your router's DNS doesn't recognize the hostname you would use "username@ipaddress". You can skip the username and just enter "ssh hostname" or "ssh ipaddress" and it will prompt you for a username.
Quick Install (Recommended)
Paste this single command into SSH using Ctrl+Shift+V on Windows or Shift+Command+V on Mac.
Tip
Terminal can be funky about pasting with just Ctrl+V, by right click -> paste or using Ctrl+Shift+V you will be able to paste without additional unwanted characters.
curl -fsSL https://raw.githubusercontent.com/ChuckBuilds/LEDMatrix/main/scripts/install/one-shot-install.sh | bash
This one-shot installer will automatically:
- Check system prerequisites (network, disk space, memory, sudo access)
- Install required system packages (git, python3, build tools, etc.)
- Clone or update the LEDMatrix repository
- Run the complete first-time installation script
- Print the web interface address, then reboot the Pi automatically (your SSH session will disconnect; give it a few minutes to come back)
The installation process typically takes 10-30 minutes depending on your internet connection and Pi model. Pi 3B/3B+ and other 1GB boards land at the top of that range, because the C++ library is compiled serially to stay within available memory. All errors are reported explicitly with actionable fixes.
Note: The script is safe to run multiple times and will handle existing installations gracefully.
Manual Installation (Alternative)
If you prefer to install manually or the one-shot installer doesn't work for your setup:
- SSH into your Raspberry Pi:
ssh ledpi@ledpi
- Update repositories, upgrade Raspberry Pi OS, and install git (
first_time_install.shinstalls the build dependencies itself:python3-pip,python-dev-is-python3,build-essential,cmake,ninja-buildand the rest):
sudo apt update && sudo apt upgrade -y
sudo apt install -y git
- Clone this repository:
git clone https://github.com/ChuckBuilds/LEDMatrix.git
cd LEDMatrix
- Run the first-time installation script:
chmod +x first_time_install.sh
sudo bash ./first_time_install.sh
This single script installs services, dependencies, configures permissions and sudoers, and validates the setup.
It finishes by asking whether to reboot. If you run it non-interactively — piped, over a script, or with -y — there is no one to ask, so it reboots immediately without prompting. Pass --no-reboot-prompt to install without rebooting:
sudo bash ./first_time_install.sh -y --no-reboot-prompt
Configuration
Configuration
Configuration
Initial Setup
For a complete list of every key in config.json and
config_secrets.json, see
docs/CONFIG_REFERENCE.md.
For most settings I recommend using the web interface: Edit the project via the web interface at http://[IP ADDRESS or HOSTNAME]:5000 or http://ledpi:5000 .
If you need to manually edit your config file, you can follow the steps below:
Manual Config.json editing
-
First-time setup: The previous
first_time_install.shscript should've already copied the template to create your config.json: -
Edit your configuration:
sudo nano config/config.json
Automatic Configuration Migration
The system automatically handles configuration updates:
- New installations: Creates
config.jsonfrom the template automatically - Existing installations: Automatically adds new configuration options with default values when the system starts
- Backup protection: Creates a backup of your current config before applying updates
- No conflicts: Your custom settings are preserved while new options are added
Everything is configured via config/config.json and config/config_secrets.json and are not tracked by Git to prevent conflicts during updates.
Running the Display
Recommended: Use Web UI Quick Actions
I recommend using the web-ui "Quick Actions" to control the Display.
Plugins
Plugin Store
See the Plugin Store documentation for detailed installation instructions.
The easiest way to discover and install plugins is through the Plugin Store in the LEDMatrix web interface:
- Open the web interface (
http://your-pi-ip:5000) - Navigate to the Plugin Manager tab
- Browse available plugins in the Plugin Store
- Click Install on any plugin you want
- Configure and enable plugins through the web UI
Installing 3rd-Party Plugins
You can also install plugins directly from GitHub repositories:
- Single Plugin: Install from any GitHub repository URL
- Registry/Monorepo: Install multiple plugins from a single repository
See the Plugin Store documentation for detailed installation instructions.
For plugin development, the plugins/hello-world/ plugin in the ledmatrix-plugins repository is a starter template.
Built-in Managers Deprecated: The built-in managers (hockey, football, stocks, etc.) are now deprecated and have been moved to the plugin system. You must install replacement plugins from the Plugin Store in the web interface instead. The plugin system provides the same functionality with better maintainability and extensibility.
Detailed Information
Display Settings from RGBLEDMatrix Library
Display Settings
If you are copying my exact setup, you can likely leave the defaults alone. However, if you have different hardware or want to customize the display behavior, these settings allow you to fine-tune the LED matrix configuration.
The display settings are located in config/config.json under the "display" key and are organized into three main sections: hardware, runtime, and display_durations.
The defaults below are the values in config/config.template.json. They are what applies when you haven't set a key: on every load, LEDMatrix adds any key your config.json lacks from the template, so DisplayManager's own fallbacks are never reached on a normal install.
The web UI and the config API refuse values the rgbmatrix library can't start with. If one is written into config.json by hand anyway, the display logs which setting it is (Failed to initialize RGB Matrix in sudo journalctl -u ledmatrix), runs in fallback mode, and the Display tab shows the message.
Hardware Configuration (display.hardware)
These settings control the physical hardware configuration and how the matrix is driven.
Basic Panel Configuration
-
rows(integer, default: 32)- Number of LED rows (vertical pixels) in each panel
- Common values: 16, 32, 48, 64
- An even number from 8 to 64, the most the rgbmatrix library drives per panel
- Must match your physical panel configuration
-
cols(integer, default: 64)- Number of LED columns (horizontal pixels) in each panel
- Common values: 32, 64, 96, 128
- At least 16, with no upper limit
- Must match your physical panel configuration
-
chain_length(integer, default: 2)- Number of LED panels chained together horizontally
- 1 to 255 (the library's Python binding stores it in one byte); longer chains lower the refresh rate
- If you have 2 panels side-by-side, set to 2
- If you have 4 panels in a row, set to 4
- Total display width =
cols × chain_length
-
parallel(integer, default: 1)- Number of parallel chains (panels stacked vertically)
- Use 1 for a single row of panels
- Use 2 if you have panels stacked in two rows
- 1–3, and no more than your
hardware_mappinghas outputs:regularandclassichave 3 (e.g. the Adafruit Triple LED Matrix Bonnet);adafruit-hat,adafruit-hat-pwm,regular-pi1andclassic-pi1have 1. The library stops the display service outright on a mismatch, so it is refused - Total display height =
rows × parallel
Brightness and Visual Settings
brightness(integer, 1-100, default: 90)- Display brightness level
- Lower values (1-50) are dimmer, higher values (50-100) are brighter
- Recommended: 70-90 for indoor use, 90-100 for bright environments
- Very high brightness may cause distortion or require more power
Hardware Mapping
hardware_mapping(string, default: "adafruit-hat")- Specifies which GPIO pin mapping to use for your hardware
"adafruit-hat-pwm": Use this for Adafruit RGB Matrix Bonnet/HAT WITH the jumper mod (PWM enabled). This is the recommended setting for Adafruit hardware with the PWM jumper soldered."adafruit-hat": Use this for Adafruit RGB Matrix Bonnet/HAT WITHOUT the jumper mod (no PWM). Remove-pwmfrom the value if you did not solder the jumper."regular": Standard GPIO pin mapping for direct GPIO connections (Generic). Also the right choice for the Adafruit Triple LED Matrix Bonnet"regular-pi1": Standard GPIO pin mapping for Raspberry Pi 1 (older hardware or non-standard hat mapping)"classic"/"classic-pi1": the library's original pin-outs, for old adapter boards wired to them. Not used by current HATs- Any other name is refused.
compute-moduleis only compiled in when the library is built withENABLE_WIDE_GPIO_COMPUTE_MODULE, which the installer doesn't do. On a Raspberry Pi 5,classic-pi1isn't supported - Choose the option that matches your specific hardware setup, if aren't sure try them all.
- Hardware pulsing (see
disable_hardware_pulsing) needs the panel's OE line on GPIO 18, whichadafruit-hat-pwmandregularprovide andadafruit-hatdoes not
PWM (Pulse Width Modulation) Settings
These settings affect color fidelity and smoothness of color transitions:
-
pwm_bits(integer, 1-11, default: 9)- Color depth per channel: how many brightness levels each LED gets
- Higher values (9-11) = more color levels, smoother gradients, lower refresh rate
- Lower values (7-8) = the subtlest shades are dropped for a higher refresh rate;
1gives 8 colors - Recommended: 9-10
-
pwm_dither_bits(integer, 0-2, default: 1)- Time-dithers the lowest color bits: their brightness comes from showing them on only some frames
- Raises the refresh rate; the cost is that dark shades can shimmer slightly
0= steadiest dim colors,2= fastest- The rgbmatrix library accepts only 0-2; a higher value stops the display starting
-
pwm_lsb_nanoseconds(integer, 50-3000, default: 130)- On-time of the least significant color bit; each higher bit doubles it
- Lower values = higher refresh rate, but can cost color accuracy or add ghosting on some panels
- Higher values = less ghosting (faint trails behind bright text on black), lower refresh rate
- Typical range: 100-300 nanoseconds
Advanced Hardware Settings
-
scan_mode(integer, 0-1, default: 0)- Order the rows are refreshed in:
0= progressive,1= interlaced - Interlaced can look a little smoother when the refresh rate is very low, but usually shows a comb effect on anything moving
- Leave at
0unless you are tuning a slow setup
- Order the rows are refreshed in:
-
limit_refresh_rate_hz(integer, default: 100)- Caps the panel refresh rate in Hz;
0= no cap - A steady cap reduces flicker caused by other activity on the Pi, and in camera recordings
- Scroll speeds are worked out against this value (against 100 Hz when it is
0), so a cap the panel can actually hold keeps scrolling even - Recommended: 80-120.
sudo python3 scripts/scroll_speeds.py --measurereports the rate your panel really achieves
- Caps the panel refresh rate in Hz;
-
disable_hardware_pulsing(boolean, default: false)false= the Pi's hardware PWM times each brightness pulse;true= software timing- Leave
falsewhere possible. Software timing is less exact, so a row, or the whole panel, can briefly flash brighter - Hardware pulsing needs the panel's OE line on GPIO 18 (
adafruit-hat-pwm,regular, the Adafruit Triple LED Matrix Bonnet). Withadafruit-hatthe library uses software timing anyway - It also needs the Pi's onboard sound driver (
snd_bcm2835) disabled, whichfirst_time_install.shdoes. Settrueonly if you need the Pi's own audio
-
inverse_colors(boolean, default: false)- Inverts all colors (red becomes cyan, etc.)
- Useful if your panel has inverted color channels
- Set to
trueonly if colors appear inverted
-
show_refresh_rate(boolean, default: false)- Prints the live refresh rate to the console; nothing is drawn on the panel
- Readable when you stop the service and run
sudo python3 run.pyin a terminal; under the service the output is buffered sudo python3 scripts/scroll_speeds.py --measureis an easier way to see the real refresh rate
Advanced Panel Configuration (Advanced Users Only)
These settings are typically only needed for non-standard panels or custom configurations:
-
led_rgb_sequence(string, default: "RGB")- Color channel order for your LED panel
- Common values: "RGB", "RBG", "GRB", "GBR", "BRG", "BGR"
- Most panels use "RGB", but some use "GRB" or other orders
- If red shows as blue, try "BGR" (the Waveshare 96x48 V2 needs it)
- Check your panel datasheet if colors appear wrong
-
pixel_mapper_config(string, default: "")- Advanced pixel mapping configuration
- Used for custom panel layouts, rotations, or transformations
- Examples: "U-mapper", "Rotate:90", "Mirror:H"
- Leave empty unless you need custom mapping
- See rpi-rgb-led-matrix documentation for full options
-
orientation(string, default: "normal")- Rotates the rendered image to match how the panel is physically mounted
- Set to
"180"(or use the "Upside Down" option in the web UI's Display settings) if the panel is mounted upside down — useful for optimizing where the Raspberry Pi and wiring sit relative to the mounting location "90"and"270"are for a panel mounted on its side; they swap the display's width and height- Applied independently of
pixel_mapper_config(appended as a trailingRotate:<degrees>mapper), so custom mapper configs keep working alongside it
-
row_address_type(integer, default: 0)- How rows are addressed on the panel
- Most panels use 0 (direct addressing)
- 1 = AB-addressed, 2 = direct row select, 3 = ABC-addressed, 4 = ABC shift + DE direct (SM5266), 5 = SM5368 / B707 row shift register
- ABC panels (no E line, e.g. many 128x64 FM6124 panels) use 3
- Panels with SM5368 row drivers use 5 with
led_rgb_sequence"BGR"— e.g. the Waveshare 96x48 V2 (back silkscreen24S-A1; the V1,24S-A2.1, uses the defaults). This is what Waveshare's96X48_1_24_SM5368panel type sets in their library fork. - SM5368 row drivers are timing-sensitive: if rows jump up and down or the
bottom row shows a copy of other rows, raise
gpio_slowdown. On a Pi 4 with an Adafruit Triple LED Matrix Bonnet, 4 left rows jumping; 6–8 gave a stable image. - On a Raspberry Pi 5 the rgbmatrix library currently supports only 0 and 2
(and
parallel1-3). Anything else would crash the display service, so on a Pi 5 the web UI offers only 0 and 2, the config API refuses the others, and if one is set inconfig.jsonanyway the display logs why and runs in fallback mode - Check your panel datasheet if display appears corrupted
-
multiplexing(integer, 0-22, default: 0)- How pixels are wired on outdoor/specialty panels (P10, P8, P4 and P3 outdoor modules and similar) whose LEDs aren't laid out in straight rows
0= direct (standard indoor panels)1Stripe,2Checkered,3Spiral,4ZStripe,5ZnMirrorZStripe,6Coreman,7Kaler2Scan,8ZStripeUneven,9P10-128x4-Z,10QiangLiQ8,11InversedZStripe,12–14P10Outdoor1R1G1B v1–v3,15P10CoremanMapper,16P8Outdoor1R1G1B,17FlippedStripe,18P10-32x16-HalfScan,19P10-32x16-QuarterScan,20P3Outdoor-64x64,21DoubleZMultiplex,22P4Outdoor-80x40- If the image is scrambled in a repeating pattern, try the value named after your panel first
-
panel_type(string, default:"")- Sends a start-up initialization sequence to driver chips that need one
""= Standard (no initialization) — right for most panels, including FM6124 / FM6124D / FM6124DJ"FM6126A"or"FM6127"for panels with those chips; try"FM6126A"if the panel stays dark or lights only the first pixel on Standard
Runtime Configuration (display.runtime)
These settings control runtime behavior and GPIO timing:
-
gpio_slowdown(integer, default: 3)- GPIO timing slowdown factor (0-10): slows GPIO writes so the panel electronics keep up. Higher is more reliable but lowers the refresh rate
- Critical setting: depends on your Raspberry Pi model and your panel
- Raspberry Pi Zero/1: 0-1
- Raspberry Pi 2/3: 1-3
- Raspberry Pi 4: 2-4 (the config template ships 3)
- Raspberry Pi 5: 1–3 in PIO mode (
rp1_rio: 0, the default). Start at1(the library treats0as1there) and raise it a step at a time if the image flickers or shows garbage — chained panels are the likeliest to need it - Panels on
row_address_type5 (SM5368 row drivers) can need 6-8 on a Pi 4 - Too low: garbage, flicker or rows jumping. Too high: a lower refresh rate
- If you experience issues, try adjusting this value up or down by 1
-
rp1_rio(integer, 0 or 1, default: 0) — Raspberry Pi 5 only- Which driver the Pi 5's RP1 chip uses:
0= PIO (default, less CPU),1= RIO (registered I/O, can reach a higher refresh rate) - In RIO mode the effect of
gpio_slowdownis inverted: higher values may be faster - Ignored on a Pi 0-4, and applied only if the installed rgbmatrix library supports it
- Which driver the Pi 5's RP1 chip uses:
Display Durations (display.display_durations)
Controls how long each installed plugin stays visible in seconds before switching to the next one, keyed by plugin id.
- Plugin-specific durations
- Each plugin can have its own duration setting
- Format:
"<plugin-id>": <seconds> - Example:
"hockey-scoreboard": 45shows hockey scores for 45 seconds - Example:
"weather": 20shows weather for 20 seconds - If a plugin doesn't have a duration here, it uses its default (usually 15 seconds)
- You can also set
display_durationin each plugin's individual configuration
Tips for Display Durations:
- Longer durations (30-60 seconds) = more time to read content, slower cycling
- Shorter durations (10-20 seconds) = faster cycling, less time per display
- Balance based on your preference and how much information each display shows
- For example, if you want more focus on stocks, increase the stock plugin's duration value
Display Format Settings
use_short_date_format(boolean, default: true)- Currently has no effect. The web UI still saves it, but no core code reads it. Scoreboard plugins that offer a short date format read the setting from their own plugin config instead. See CONFIG_REFERENCE.md.
Dynamic Duration Settings (display.dynamic_duration)
max_duration_seconds(integer, optional)- Maximum duration cap for plugins that use dynamic durations
- Some plugins can automatically adjust their display time based on content
- This setting limits how long they can extend (prevents one display from dominating)
- Example: If set to 60, a plugin can extend up to 60 seconds even if it requests longer
- Leave unset to use the default cap (180 seconds; the web UI accepts 30-1800)
Example Configuration
{
  "display": {
    "hardware": {
      "rows": 32,
      "cols": 64,
      "chain_length": 2,
      "parallel": 1,
      "brightness": 90,
      "hardware_mapping": "adafruit-hat-pwm",
      "scan_mode": 0,
      "pwm_bits": 9,
      "pwm_dither_bits": 1,
      "pwm_lsb_nanoseconds": 130,
      "disable_hardware_pulsing": false,
      "inverse_colors": false,
      "show_refresh_rate": false,
      "limit_refresh_rate_hz": 100
    },
    "runtime": {
      "gpio_slowdown": 4
    },
    "display_durations": {
      "calendar": 30,
      "hockey-scoreboard": 45,
      "weather": 20,
      "stocks": 25
    },
    "use_short_date_format": true,
    "dynamic_duration": {
      "max_duration_seconds": 60
    }
  }
}
Troubleshooting Display Settings
Display is blank or shows garbage:
- Check
rows,cols,chain_length, andparallelmatch your physical setup - Verify
hardware_mappingmatches your HAT/connection type - Try adjusting
gpio_slowdown - Ensure your display doesn't need the E-Addressable line
- If it went blank right after a settings change, the Display tab shows a "simulation mode" banner, and
sudo journalctl -u ledmatrixshowsFailed to initialize RGB Matrixfollowed by the reason. When LEDMatrix refused the settings (for example more than 64rows,parallel2 on anadafruit-hatmapping, a misspelledhardware_mapping, or on a Raspberry Pi 5 arow_address_typeother than 0 or 2), the message names each one: change them, save, and restart the display service. Otherwise the library itself failed, and its own message just before names the problem - A repeating scramble points at
row_address_typeormultiplexing; a panel that stays dark, atpanel_type
Rows jump up and down, or the bottom row repeats other rows:
- Raise
gpio_slowdowna step at a time (SM5368 panels onrow_address_type5 can need 6-8 on a Pi 4)
A row or the whole panel briefly flashes brighter:
- Set
disable_hardware_pulsingtofalse(needs the OE line on GPIO 18; seehardware_mapping)
Colors are wrong or inverted:
- Check
led_rgb_sequence(try "GRB" if "RGB" doesn't work) - Try setting
inverse_colorstotrue - Verify
hardware_mappingis correct for your hardware
Display flickers or is unstable:
- Increase
gpio_slowdownby 1-2 - Lower
limit_refresh_rate_hzto 60-80 - Check power supply (LED matrices need adequate power)
Display is too dim or too bright:
- Adjust
brightness(0-100) - Very high brightness may require better power supply
Performance issues:
- Lower
limit_refresh_rate_hz - Reduce
pwm_bitsto 8 - Set
pwm_dither_bitsto 0
Manual SSH Commands (for reference)
The web interface's quick actions (Start/Stop/Restart Display) call
sudo systemctl start|stop|restart ledmatrix.service — see
execute_system_action() in
web_interface/blueprints/api_v3/system.py.
The service runs run.py as root.
To run the display in the foreground instead (for debugging), stop the service
first, then from the project root (e.g. /home/ledpi/LEDMatrix):
sudo systemctl stop ledmatrix.service
sudo python3 run.py          # add -d for debug logging
This only runs as long as your SSH session stays open.
Convenience Scripts
Two convenience scripts are provided for easy service management:
start_display.sh- Starts the LED matrix display servicestop_display.sh- Stops the LED matrix display service
Make them executable with:
chmod +x start_display.sh stop_display.sh
Then use them to control the service:
sudo ./start_display.sh
sudo ./stop_display.sh
Service Installation Details
The first time install will handle this: The LEDMatrix can be installed as a systemd service to run automatically at boot and be managed easily. The service runs as root to ensure proper hardware timing access for the LED matrix.
Installing the Service (this is included in the first_time_install.sh)
- Make the install script executable:
chmod +x scripts/install/install_service.sh
- Run the install script with sudo:
sudo ./scripts/install/install_service.sh
The script will:
- Detect your user account and home directory
- Install
ledmatrix.service(display, runs as root),ledmatrix-web.service(web interface, runs as your user) and theledmatrix-update-verifyunits, with the correct paths - Enable them to start on boot
- Start them immediately
Managing the Service
The following commands are available to manage the service:
# Stop the display
sudo systemctl stop ledmatrix.service

# Start the display
sudo systemctl start ledmatrix.service

# Check service status
sudo systemctl status ledmatrix.service

# View logs
journalctl -u ledmatrix.service

# Disable autostart
sudo systemctl disable ledmatrix.service

# Enable autostart
sudo systemctl enable ledmatrix.service
Web Interface Installation Details
The first time install will handle this: The LEDMatrix system includes Web Interface that runs on port 5000 and provides real-time display preview, configuration management, and on-demand display controls.
Installing the Web Interface Service
The first-time installer (
first_time_install.sh) already installs the web service. The steps below only apply if you need to (re)install it manually.
- Make the install script executable:
chmod +x scripts/install/install_web_service.sh
- Run the install script with sudo:
sudo ./scripts/install/install_web_service.sh
The script will:
- Copy the web service file to
/etc/systemd/system/ - Enable the service to start on boot
- Start the service immediately
- Show the service status
Web Interface Configuration
The web interface can be configured to start automatically with the main display service:
- In
config/config.json, ensure the web interface autostart is enabled:
{
    "web_display_autostart": true
}
- The web interface will now start automatically when:
- The system boots
- The
web_display_autostartsetting istruein your config
Accessing the Web Interface
Once installed, you can access the web interface at:
http://your-pi-ip:5000
Managing the Web Interface Service
# Check service status
sudo systemctl status ledmatrix-web.service

# View logs
journalctl -u ledmatrix-web.service -f

# Stop the service
sudo systemctl stop ledmatrix-web.service

# Start the service
sudo systemctl start ledmatrix-web.service

# Disable autostart
sudo systemctl disable ledmatrix-web.service

# Enable autostart
sudo systemctl enable ledmatrix-web.service
Web Interface Features
- Real-time Display Preview: See what's currently displayed on the LED matrix
- Configuration Management: Edit settings through a web interface
- On-Demand Controls: Start specific displays (weather, stocks, sports) on demand
- Service Management: Start/stop the main display service
- System Controls: Restart, update code, and manage the system
- System Stats: CPU, memory and temperature on the Overview tab
- Logs: View system logs in real-time
Troubleshooting Web Interface
Web Interface Not Accessible After Restart:
- Check if the web service is running:
sudo systemctl status ledmatrix-web.service - Verify the service is enabled:
sudo systemctl is-enabled ledmatrix-web.service - Check logs for errors:
journalctl -u ledmatrix-web.service -f - Ensure
web_display_autostartis set totrueinconfig/config.json
Port 5000 Not Accessible:
- Check if the service is running on the correct port
- Verify firewall settings allow access to port 5000
- Check if another service is using port 5000
Service Fails to Start:
- Check Python dependencies are installed. The installer puts them in the
system Python with
pip install --break-system-packages(there is no virtual environment), sopython3 -c "import flask"should succeed. - Check file permissions and ownership
If you've read this far — thanks!
License
LEDMatrix is licensed under the GNU General Public License v3.0 or later.
LEDMatrix builds on
rpi-rgb-led-matrix,
which is GPL-2.0-or-later. The "or later" clause makes it compatible
with GPL-3.0 distribution.
Plugin contributions in
ledmatrix-plugins
are also GPL-3.0-or-later unless individual plugins specify otherwise.
Contributing
See CONTRIBUTING.md for development setup, the PR flow, and how to add a plugin. Bug reports and feature requests go in the issue tracker. Security issues should be reported privately per SECURITY.md.